fucked up how cooking and baking from scratch is viewed as a luxury…..like baking a loaf of bread or whatever is seen as something that only people with money/time can do. I’m not sure why capitalism decided to sell us the idea that we can’t make our own damn food bc it’s a special expensive thing that’s exclusive to wealthy retirees but it’s stupid as hell and it makes me angry
bread takes like max 4 ingredients counting water and sure it takes a couple hours but 80% of that is just waiting around while it does the thing and you can do other things while it’s rising/baking
plus im not gonna say baking cured my depression bc it didn’t but man is it hard to feel down when you’re eating slices of fresh bread you just made yourself. feels like everything’s gonna be a little more ok than you thought. it’s good.
bread is amazing and it’s also been sold to us as something really hard to make? Every time I tell someone I made a loaf of bread I get reactions like “you made it yourself???” and “do you have a bread machine then?” I haven’t touched a bread machine in probably 10 years. You CAN make your own bread, folks, and it’s actually pretty cheap to do so. I believe the most expensive thing I needed for it was the jar of yeast. It was about $6 at the grocery store and lasted me MONTHS (just keep it in the fridge.) The packets are even cheaper. destroy capitalism. bake your own bread.
You can also make your own yeast by making a sourdough starter, so that cuts cost even more.
But you have to feed the starter daily/weekly and that means it grows quickly, but there are tons of recipes online for what to do with your excess starter. Cookies, pretzels, crackers, pancakes, waffles, you name it!!
Make it even easier – “No-Knead Bread”. All YOU do is mix the ingredients together and wait until it’s time to heat the oven. The yeast does all the rest.
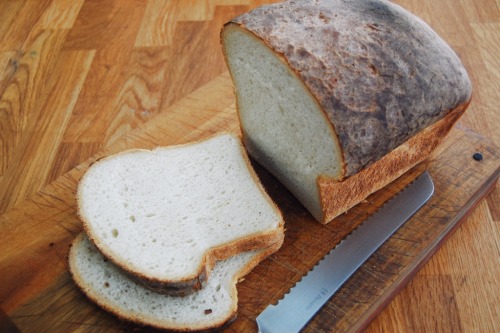
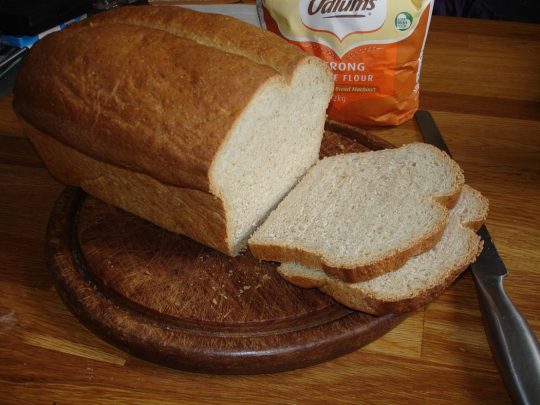
Here’s @dduane’s first take on itand the finished product. We’ve made even more photogenic batches since.
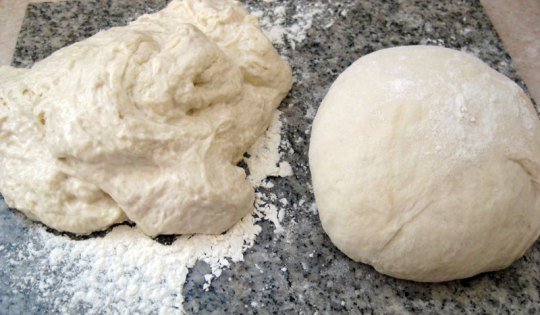
Kneading is easy as well; either let your machine do it, or if you don’t want to or don’t have one, get hands-on. It’s like mixing two colours of Plasticine to make a third. Flatten, stretch, fold, half-turn, repeat – it takes about 10 minutes – until the gloopy conglomeration of flour, yeast, salt and water that clings to your hands at the beginning, becomes a compact ball that doesn’t stick to things and feels silky-smooth.
Here’s what before and after look like.
My Mum used to say that if you were feeling out of sorts with someone, it was good to
make bread because you could transfer your annoyance into kneading the
dough REALLY WELL, and both you and the bread would be better for it.
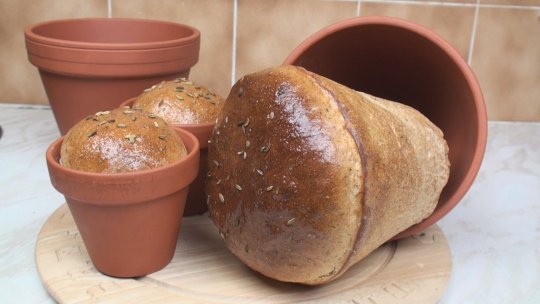
Then you put it into a bowl, cover it with cling-film and let it rise until it doubles in size, turn it out and “knock it back” (more kneading, until it’s getting back to the size it started, this means there won’t be huge “is something living in here?” holes in the bread), put it into your loaf-tin or whatever – we’ve used a regular oblong tin, a rectangular Pullman tin with a lid, a small glass casserole, an earthenware chicken roaster…
You can even use a clean terracotta flowerpot.
Let the dough rise again until it’s high enough to look like an unbaked but otherwise real loaf, then pop it in the preheated oven. On average we give ours 180°C / 355°F for 45-50 minutes. YM (and oven) MV.
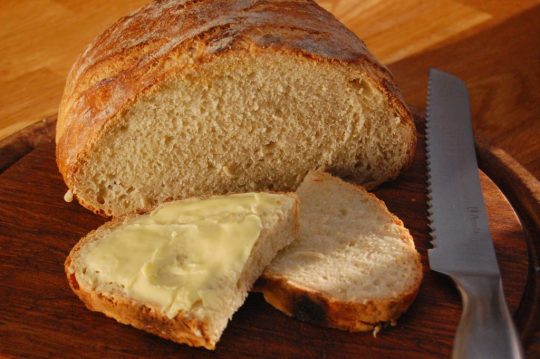
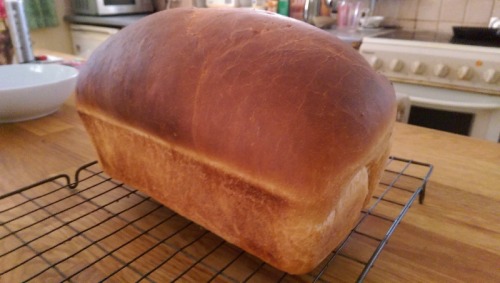
Here’s some of our bread…
Here’s our default bread recipe – it takes about 3-4 hours from flour jar to cutting board depending on climate (warmer is faster) most of which is rise time and baking; hands-on mixing, kneading and knocking-back is about 20 minutes, tops, and less if using a mixer.
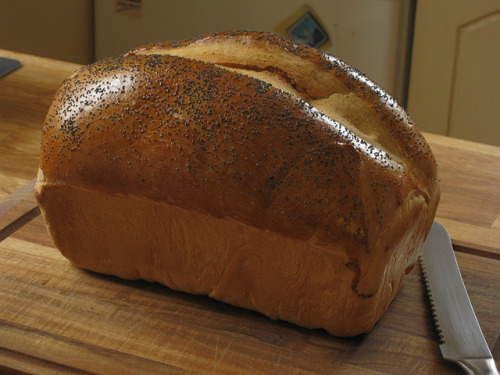
Here ( or indeed any of the other pics) is the finished product. This one was given an egg-wash to make it look glossy and keep the poppy-seeds in place; mostly we don’t bother with that or the slash down the middle, but all the extras were intentional as a “ready for my close-up” glamour shot.
I think any shop would be happy to have something this good-looking on their shelf.
We’re happy to have it on our table.
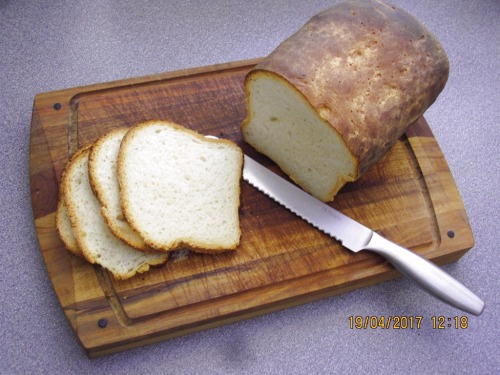
Even if your first attempts don’t work out quite as well as you hope, you can always make something like this…
can we have more posts like this in future please? this is really useful and could help those who are struggling
…it’s not hard?………shit….I always thought it was
destroy capitalism. bake your own bread.
I support this message.
Mix the dough in the morning, knead it before you go to work, leave it on the counter, shape and bake it when you get home. Make it into dinner rolls in a pan if you like.
Mix the dough before you go to bed, leave it on the counter overnight, toss it in the oven when you first get up in the morning. Have a couple of slices for breakfast.
Don’t try to slice it when it’s hot, because you’ll crush it. Tear it apart instead, or wait for it to cool down to skin temperature.
Uneducated peasants were baking bread a thousand years before we were born. You can do it too. It’s cheaper than good store-bought bread. And oh, it’s so satisfying.
Pasta is great. It’s like hey, let me take delicious things like butter,or meat, or tomatoes or basil and then let me just fuckin mix whatever the fuck i want in and combine it with some random ass noodles.
That’s basically pasta.
BUT, there’s a big difference between “basically pasta” and “holy shit food of the gods” pasta, and that is that the latter has some rules that must be followed.
10 PASTA COMMANDMENTS COMIN UP:
Always boil pasta in boiling SALTED water. Ever had a dish where you forgot to salt it before cooking it, and no matter how much seasoning you did post saute/sear, it still sort of tasted bland on the inside? Same goes for pasta. Your sauce could be fuckin on point, but if you don’t salt dat pasta water, ya fugged, bruh.
Always have your sauce ready BEFORE the pasta. Pestos, emulsified butter sauces, bolognese sauces, they should be in their respective sauce pans, heated and ready to go (unless we’re takin pesto or carbonarashit, as those go bad with heat). The worst thing you could do is fuck up and overcook your delicious pasta bc you were too busy making or finishing up your sauce.
Always TASTE your pasta. I don’t care if the package says it’s ready in 1 minute or an hour, taste your pasta from the boiling water at least 2 minutes in, and every 2 minutes after that. Al dente’s usually the way to go, but you’ll never know when to take it out if you’re not constantly tasting.
DO NOT strain your pasta, wasting your pasta water and allowing your pasta to cool. Use tongs to take pasta straight up form the boiling water (don’t dry it, nerds) and throw it in your sauce. A little pasta water gets in? no probs, and I’ll tell you why.
If your sauce is reducing too much, or it’s too tight, add pasta water. It’s salted and hot and ready to go, it won’t dilute the flavor at all, you’re golden duude. golden.
Finish your pasta in the sauce, allow it to become homogenous, let the sauce stick to the pasta, BECOME ONE WITH THE PASTA BRUH.
Add cheese last, because cheese get’s weird and fucked up in hot pans, so it’s best to throw that on right before you’re ready to eat that shit up.
4 oz is a normal serving size for pasta. If you don’t have a scale, that’s basically like the first pic above. If you hold the pasta like such, and the width of the bunch is a little smaller than an american quarter, then ur good 2 go bruh.
Dry pastas are not better/worse than fresh pasta. They’re legit just made with different flours using different procedures. One isn’t ‘fancier’ than the other u pretentious buttrockets.
PASTA IS NOT SCARY, IT’S DELICIOUS. These rules look tough, but honestly it’s not that bad bruh. I believe in u.
and now, onto the recipe I used for my pasta. It’s a restaurant favorite, we always make it on the line because it’s simple, delicious and super filling.
~
Caciopepe Pasta serves: 1 (lol like id share this with ppl lolol)
–
Ingredients-
salt water for boiling (just salt some water, don’t fuckin travel to the beach in hopes of created the most bomb pasta ever)
1 bunch of pasta
2 bay leaves
1 sprig thyme
cold butter (approximately 2/3 cups cut into small pads
parmesan cheese to taste
a shit ton of black pepper to taste
–
Procedure-
Throw some pasta into some boiling water and do that thing where you constantly taste test the pasta to see if it’s ready. In the meantime, make ur sauce u lazy bumbum.
Add a little boiling pasta water to a saute pan over low heat, and whisk/mix in the butter quickly till it’s creamy and emulsified. If it’s too thick, just whisk in a teeny bit of pasta water. Add 2 bay leaves and a sprig of thyme for aroma, remove when pasta’s ready.
Once the pasta’s ready to rock and roll, use tongs to scoop it up and place it in the sauce. Flip and mix using tongs. Add cheese and crack a lot of pepper. Add salt if it needs seasoning, add more pasta water if the sauce tightens.
and bam, ya ready to roll.
~
I promise u if you use these pasta techniques, people will think ur literally a GOD. ur welcs.
Thumbs up!
Pasta done properly is great, and the difference between great and not is right here.
Especially that tasting / testing. If pasta is too hard it can cook a bit more, but pappy overdone pasta can’t be uncooked.
A simple dish like this has no elaborate sauce or fussy presentation to
conceal mistakes – but also nothing to distract from how well it works when
it’s just right.
Pasta cacio e pepe (pasta with cheese and pepper) at its most basic doesn’t even use herbs or butter – *freshly grated
cheese is either whisked into a little of the cooking water or just piled on top of the peppered hot pasta – so you can play with different cheeses like Parmesan, Gran Padano or Pecorino and actually taste their differences.
Adding butter just makes it easier and doesn’t spoil anything.
*Using pre-grated “Parmesan” from a jar might. Those sarcastic quotation marks are deliberate – here’s why.
Try dry-roasting the peppercorns before grinding them.
Simple herbs like the bayleaf and thyme in this recipe won’t argue either, but try a little tarragon. I’ve recently become very fond of tarragon.
Or saffron. Just a pinch of one or the other. Next time, try a pinch of both.
And whatever recipe you use, make enough for two.
Even if you’re alone… :->
Addendum to the pasta water part: you know how it gets kinda milky and opaque? That’s starch that’s come off the pasta, and it can be really useful in bringing your sauce together and helping it stick to the pasta. I always add at least a cup of pasta water to my spaghetti sauce (skimmed off right before I drain it), and it’s just the right finishing touch.
And while I’m talking about it – I always deglaze my spaghetti sauce with a hefty dose of red wine, because it cuts through the richness of the meat and tomatoes. You should also know that the quality of your canned tomatoes matters a lot in your red sauce. I exclusively use Cento products, because they come from Italy and have the texture of red velvet, yet even the 28 oz cans of crushed tomatoes are only around $3. (San Marzano tomatoes are supposed to be the best in the world, so those cans cost more like $6, but imo the regular Cento is just as good.)
It’s much better to use quality unseasoned tomato sauce than a jarred sauce with lots of herbs but shitty tomatoes. I cook it with chopped onion, lots of chopped garlic, and a palmful of oregano in addition to salt,pepper, and chili flakes.
This delicious, subtly spiced apple bread is the perfect autumn treat! Enjoy a slice or two with a cup of coffee in the morning or anytime
you’re craving a little something sweet.
INGREDIENTS –
2 cups white sugar 1 cup vegetable oil 3 large eggs 1 teaspoon vanilla extract 2 cups grated apple (see Notes) 3 cups all-purpose flour 2 teaspoons ground cinnamon 1 teaspoon ground nutmeg ¼ teaspoon ground cloves 1 teaspoon baking soda ¼ teaspoon baking powder 1 teaspoon salt
INSTRUCTIONS –
Preheat oven to 350°F. Lightly grease two 9 x 5-inch loaf pans.
In a large bowl, using an electric mixer, beat sugar and vegetable oil to blend.
Add in eggs, one at a time, then vanilla mixing after each addition.
Add in the apple and stir to combine.
In another large bowl, sift together (I use a whisk) flour, cloves, cinnamon, nutmeg, baking soda, baking powder and salt.
Stir flour mixture into apple mixture in 2 or 3 additions until just combined.
Spoon batter evenly into loaf pans.
Bake in preheated oven for 45 – 50 minutes or until a toothpick inserted into the middle of a loaf comes out clean.
Cool loaf pans on wire racks for 10 minutes. Remove loaves from pans, place on racks and cool completely.
NOTES –
About 2 – 3 apples yields 2 cups grated apple. I used a combination of
Gala and McIntosh. I remove the skin from the apple as my kids prefer it
this way, but you can leave the skins on if you prefer. I use my food
processor, fitted with the metal blade, to grate the apple.


You must be logged in to post a comment.